Complete Campervan Conversion Guide UK
Converting a van into a camper isn’t just about throwing in a bed and calling it a day. In the UK, it’s a mix of freedom, practicality, and a fair bit of bureaucracy. Whether you’re chasing weekend getaways or planning full-time vanlife, a proper conversion can turn a rusty panel van into a mobile home that’s warm, legal, and comfortable.
In this campervan conversion guide, we'll explore how to transform your vehicle into a comfortable living space.
Van conversions have exploded in popularity across Britain. Rising campsite costs, more flexible working, and the lure of road trip adventures make building your own campervan a tempting option. Done right, you’ll have a home on wheels tailored to your lifestyle. Done wrong, you could waste thousands and end up with damp walls, dodgy electrics, or an MOT fail
The good news? You don’t need to be a master carpenter or electrician to pull off a conversion. With the right tools, planning, and guidance, anyone with basic DIY skills can tackle the project. Yes, there are learning curves, but thousands of self-builders in the UK have proven it’s achievable and incredibly rewarding.
This guide covers every stage of a conversion, step by step: planning, stripping, insulation, electrics, plumbing, heating, layout, tools, safety, and legalities. Think of it as your build bible. We’ll point you toward specialist guides for each stage like insulation, layout, and materials so you can dig deeper without drowning in half-baked internet advice.
We’ll also keep things realistic. Converting a van isn’t cheap or quick. Costs vary from around £3,000 for a basic DIY build to £15,000+ for something closer to showroom finish. Time-wise, you’re looking at weeks to months depending on how much spare time you can throw at it. But the payoff? Freedom to explore without hotel bookings or campsite fees.We’ll also tackle the less glamorous stuff: DVLA reclassification, insurance implications, MOT requirements, and safety checks. A conversion isn’t worth much if it doesn’t meet UK legal standards, and ignoring those rules can cost you dearly. Get the basics right from the start, and you’ll avoid painful rework later.
By the end of this campervan conversion guide, you’ll know exactly what goes into a UK campervan conversion, how to avoid the most common mistakes, and what order to tackle the jobs in.
Planning Your Campervan Conversion
Before you pick up a drill or order your first roll of insulation, planning is everything. A campervan build is more than a weekend project it’s a major commitment of money, time, and energy. Rushing into it without a clear plan is the number one reason people abandon half-finished vans or spend double their budget fixing mistakes.
Start with the van itself. Size matters here. Do you want a compact SWB (short wheelbase) that’s nimble for city driving, or a LWB (long wheelbase) with room for fixed beds and showers? Popular choices in the UK include the Ford Transit, Mercedes Sprinter, VW Crafter, and Vauxhall Movano. Each has pros and cons, so weigh reliability, running costs, and interior space.
Budgeting is the next hurdle. A bare-bones DIY conversion might come in under £5,000 if you’re frugal and creative. Go for lithium batteries, diesel heaters, and top-spec materials, and you’ll quickly blow past £15,000. The key is setting a realistic budget early and allocating funds to essentials like insulation, electrics, and plumbing before splurging on gadgets and fancy finishes.
It’s also worth considering how much you’ll actually use the van. If you’re a weekend warrior, you don’t need a full-blown kitchen and shower setup those extras add cost and complexity. Full-timers, however, need to prioritise comfort, storage, and reliable off-grid power. Being brutally honest about your lifestyle now saves wasted money and space later.
Insurance is another planning essential. Once you’ve converted your van, your insurer will want to know exactly what you’ve done. Some providers won’t cover self-builds at all, while others specialise in them. Shop around early and make sure your budget includes an accurate insurance premium, which often rises once a van becomes a motor caravan or modified vehicle.
In the UK, DVLA reclassification can be both a blessing and a headache. If you reclassify your van as a “motor caravan,” you might save on tolls and ferry fares, and insurers may be more flexible. But DVLA rules are strict - you’ll need fixed beds, cooking facilities, and specific interior features. Failing to meet the criteria means staying as a “van with windows.”
Some builders skip reclassification altogether, but that can lead to awkward conversations with insurers and MOT testers. If your van doesn’t meet motor caravan requirements, you’ll need to be clear it’s a modified goods vehicle. Planning for DVLA compliance from the outset avoids costly redesigns later. This is one of those times when paperwork really does matter.
At this stage, draw up your floor plan. Even a rough sketch helps visualise where beds, kitchens, storage, and electrics will go. Don’t worry if it’s not perfect—the design will evolve. The important thing is deciding how you’ll use the space. See Designing the Perfect Campervan Layout for an in-depth guide.
You should also consider weight limits. Every van has a maximum authorised mass (MAM), and overloading it can result in fines, MOT failures, and unsafe handling. Plan your build with weight distribution in mind - batteries, water tanks, and furniture add up fast. A lightweight build might mean fewer luxuries, but it’s better than being illegal on the road.
Another overlooked factor is stealth. If you plan to wild camp around the UK, a van that looks like a builder’s vehicle is less likely to attract attention than one covered in decals and skylights. Decide now whether you want your van to scream “camper” or blend into the background - it affects layout, windows, and even insurance.
Time planning is as important as budget. Are you tackling this evenings and weekends, or taking weeks off work to blitz it? A full build often takes three to six months for part-timers, longer if you’re new to DIY. Breaking the project into phases - strip-out, insulation, wiring, build - keeps it manageable and stops overwhelm.
Think about whether you’ll DIY every step or outsource certain jobs. Gas installations, for example, require certification to meet UK safety standards. Electrical systems are doable with research, but if you’re not confident, a professional check is a smart investment. Saving a few quid isn’t worth risking fire or failed safety inspections later.
Another planning step is sourcing materials. Prices and availability fluctuate, especially for timber and insulation. If you’ve budgeted tightly, buying in advance can save money. For a detailed breakdown of what you’ll need, check our guide to Essential Tools & Materials for DIY Conversions. Being prepared avoids mid-build delays when you realise you’re missing screws or sealant.
Resale value is worth factoring in, too. Even if you think this is your forever van, life changes. Conversions with fixed beds, professional electrics, and neat finishes sell far better than half-finished or quirky builds. A little planning now could mean an extra few grand back when you eventually sell.
Finally, talk to others who’ve done it. The UK vanlife community is huge - forums, YouTube channels, and social groups are full of advice. Learn from their mistakes before making your own. Every conversion is unique, but the core lessons are universal: plan thoroughly, budget realistically, and don’t cut corners on safety.
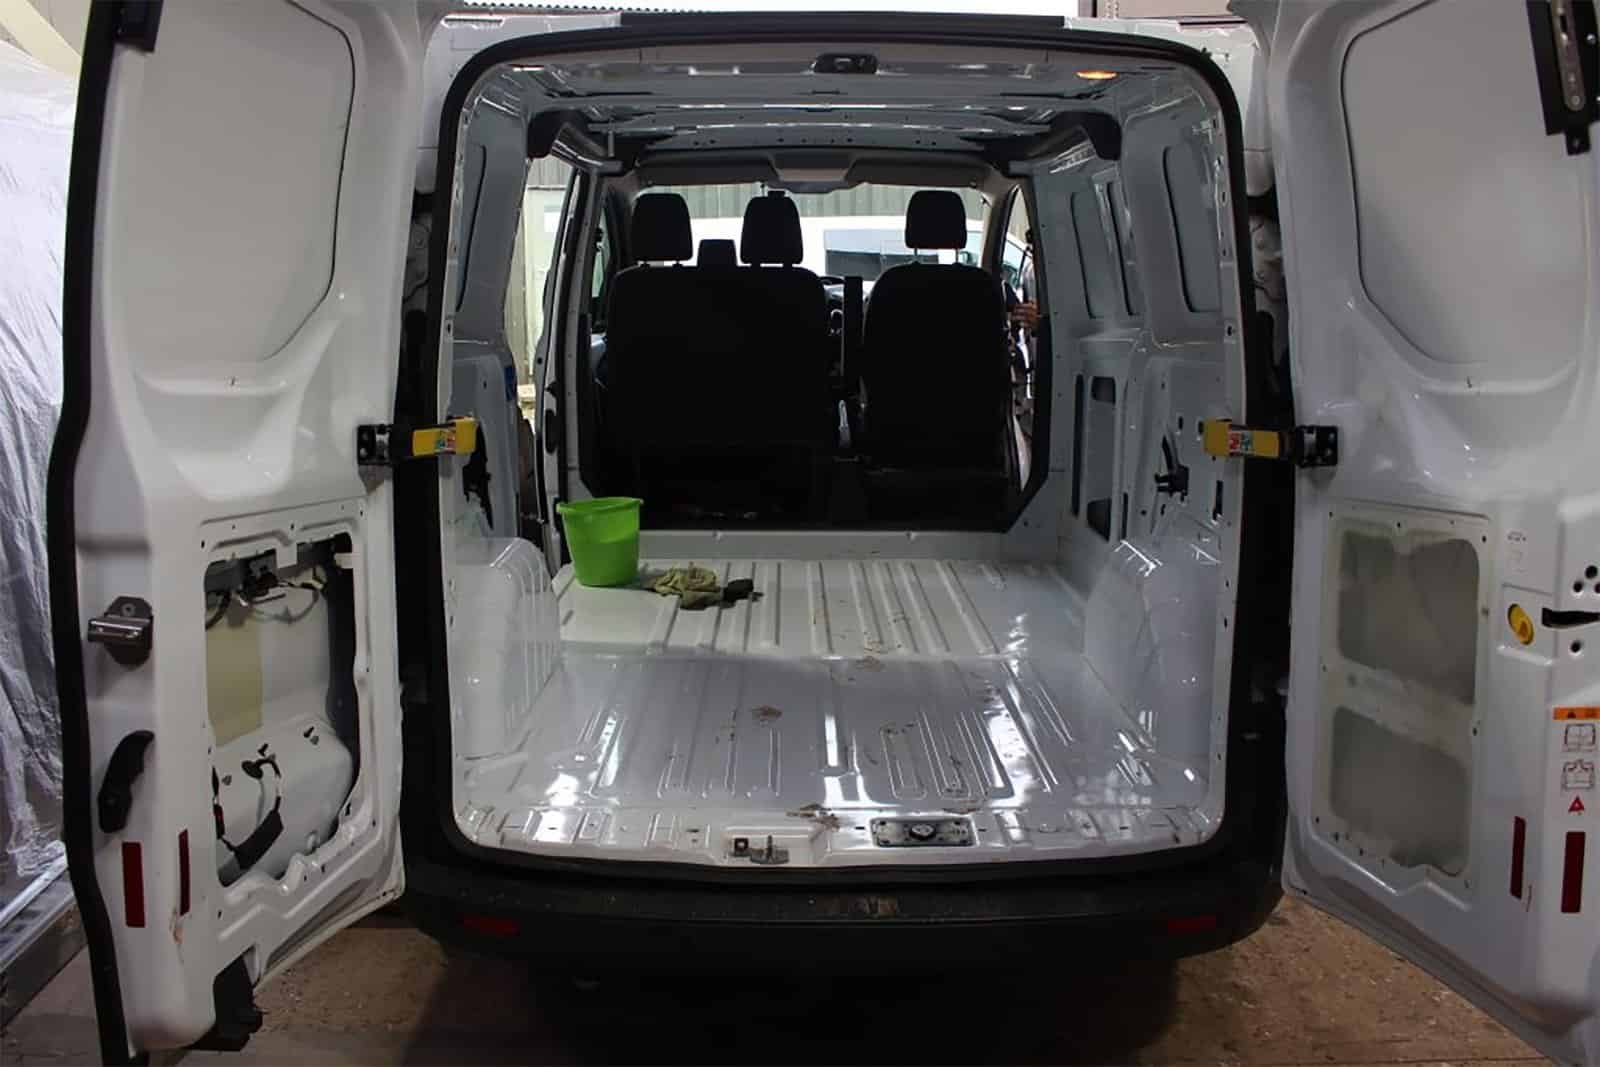
Stripping & Prepping the Van
Once you’ve planned your layout and budget, the first hands-on step is stripping out the van. Most vans will come with plywood lining, bulkheads, and sometimes old shelving or racking. Get everything out - seats, flooring, panels, and headliners. You’re aiming for a bare metal shell. This gives you a blank canvas and lets you inspect for damage or rust.
Removing factory bulkheads can be a bit of a mission. They’re often bolted or spot-welded in, and you’ll need an angle grinder or drill to get them out. Some builders leave the bulkhead in for insulation and soundproofing purposes, but most remove it for an open-plan feel. This choice depends on whether you want maximum space or improved cab noise reduction.
Check underneath the flooring. Vans are notorious for trapping moisture under ply, especially if it’s been used for heavy work before. Pull it up and inspect the steel floor for rust patches. Surface rust can be treated with wire brushes and rust converter, but deeper rust may need cutting out and welding. Addressing this now prevents future structural headaches.
If you’re unlucky, you might find more serious issues like rotten sills or wheel arches. Don’t panic - it’s common in older UK vans. If the rust compromises structure, it needs fixing before you can continue. Spending a few hundred on welding now is better than facing an MOT failure later. Never skimp on structural safety, even if it delays your build.
Sound deadening is worth tackling at this stage. Once the interior is stripped, you can add butyl mats or foam panels directly to the metal. These cut down on road noise and vibrations, which is particularly noticeable on motorways. For a deep dive into materials and techniques, see Campervan Insulation & Soundproofing Guide It’s far easier to do this now before fitting insulation and cladding.
Cleanliness is critical. After stripping, give the van a full clean - vacuum out debris, degrease surfaces, and wipe down with solvent. Dust and oil will stop adhesives, sound deadening, and insulation from sticking properly. A clean shell is also easier to mark up for wiring runs, battens, and flooring. Don’t cut corners here - it saves rework later.
Now’s the time to think about wiring. Before you insulate or panel anything, decide where cables for lights, sockets, fans, and solar charge controllers will run. Mark these pathways on the metal with tape or marker pen. It’s much easier to plan cable runs in an empty van than retrofitting later. See Campervan Electrical Systems Explained for wiring basics.
Once wiring routes are planned, you can start adding conduit or trunking. This protects cables from sharp metal edges and makes them easier to replace in future. Even if you don’t wire immediately, laying conduit during the prep stage saves massive hassle. Think of it as future-proofing your build - your later self will thank you.
While prepping, inspect for leaks. Common trouble spots include around windscreen seals, rear doors, and roof seams. Water ingress is a nightmare once insulation is fitted, as it leads to damp and mould. If you spot signs of leakage, reseal with appropriate automotive sealant. Don’t move forward until you’re confident the van shell is watertight.
Floor preparation is next. After removing old ply and treating rust, apply a protective coat - options include Hammerite, Rust-Oleum, or even bed liner paint. This adds a layer of defence against corrosion and daily wear. Some builders also use adhesive-backed insulation foam at this stage, but the key is to create a clean, sealed foundation before you start layering materials.
This is also the best stage to fit any new windows or roof vents. Cutting into your van later means working around insulation, panelling, and wiring—far messier. Prepping the van bodywork now avoids headaches down the road. Check Installing Campervan Windows & Skylights for a dedicated guide on this stage of the build.
Safety gear shouldn’t be overlooked. Cutting, grinding, and sanding create dust and sharp edges. Invest in PPE: gloves, safety glasses, and a good respirator. This isn’t a job for cheap paper masks - fibreglass, rust, and brake dust are nasty on lungs. Keep a fire extinguisher nearby too, especially if you’re using grinders or welders on the shell.
Tools you’ll need at this stage include socket sets, drills, pry bars, grinders, and a rivet gun. For a full kit breakdown, see Essential Tools & Materials for DIY Conversions Having the right tools ready avoids “half-stripped van syndrome” where progress stalls while you run to Screwfix for a missing bit.
Be ruthless about what you remove. Old ply with oil stains? Bin it. Rusty screws and brackets? Get rid. Clinging to scrap material for “future use” usually leads to clutter and wasted time. A stripped, bare, and clean van shell is the perfect foundation. Anything else is just dead weight.
Finally, take photos as you strip and prep. These reference shots will be invaluable later when you’re scratching your head about wiring routes, bracket locations, or panel fittings. They also help if you sell the van - buyers love seeing a documented build process, especially proof that rust was treated properly.
Insulation & Soundproofing
Insulation is one of the most critical stages in any UK campervan conversion. Without it, you’ll freeze in winter, overheat in summer, and fight constant condensation. The UK’s damp climate makes this step especially important. Choosing the right materials and installing them properly means the difference between a comfortable, energy-efficient van and a cold, mouldy box that ruins your gear and bedding.
There’s no one-size-fits-all insulation solution. Builders in the UK typically choose between natural fibres like sheep wool, rigid boards like PIR, spray foams, or flexible options like recycled plastic. Each material has unique pros and cons - thermal efficiency, ease of installation, moisture resistance, and of course, cost. The right choice depends on your budget, climate needs, and how permanent you want your build to be.
Sheep’s wool insulation is a favourite among eco-conscious vanlifers. It’s breathable, manages moisture well, and has great thermal properties. It’s also renewable and less itchy to install compared to fibreglass. The downside is cost - it’s usually pricier than synthetic alternatives. It can also attract moths if not treated, although most UK suppliers now pre-treat their wool to prevent infestations.
PIR boards, like Celotex or Kingspan, are another common option. They’re rigid, lightweight, and have excellent R-values (thermal resistance). They’re ideal for large flat areas like walls, floors, and ceilings. The drawback? They’re harder to fit into curved or awkward spaces, and gaps left unsealed can reduce effectiveness. You’ll need to cut carefully and tape all joins to avoid thermal bridging.
Spray foam insulation divides opinion. On the plus side, it fills every cavity and creates a seamless vapour barrier. On the downside, it’s messy, permanent, and difficult to repair or remove if you change your layout later. It’s also more expensive and requires specialist equipment. For many DIYers, the loss of flexibility outweighs the performance gains.
Recycled plastic insulation is a middle ground. Flexible, affordable, and relatively easy to install, it’s similar to traditional fibreglass but safer to handle. It’s not quite as thermally efficient as PIR or wool, but it’s widely available in the UK and works well when layered in cavities. For budget-conscious builds, it’s a practical and accessible option.
Once you’ve chosen materials, the next step is installing a vapour barrier. This thin plastic sheet prevents warm, moist air inside the van from condensing on cold metal surfaces. Without it, even the best insulation will fail as condensation soaks in, leading to damp and mould. Taping seams and sealing edges carefully is vital for a proper barrier.
Soundproofing goes hand in hand with insulation. Vans are naturally noisy - road vibrations, rain on the roof, rattling panels. Adding sound-deadening mats to doors, wheel arches, and large metal surfaces significantly reduces this. For a step-by-step process, see our Campervan Insulation & Soundproofing Guide Doing it early makes every mile quieter and less fatiguing.
Floors and ceilings deserve special attention. A well-insulated floor prevents cold seeping up from the road, while roof insulation stops summer heat turning the van into an oven. Many UK builders use rigid boards for the floor, flexible insulation in ceiling curves, and vapour barriers on both. It’s a layered approach that maximises comfort and efficiency.
Don’t forget about doors. Sliding and rear doors are often overlooked, but they’re major sources of heat loss. Stuffing cavities with wool or recycled plastic works well, while adding sound-deadening mats reduces rattles. Just be careful not to block drainage holes - these are essential for preventing water buildup inside door panels.
Weight is another consideration. Overloading a van affects handling and legality. Wool and recycled plastic are lighter, while PIR adds weight but offers better insulation per thickness. Plan carefully to balance efficiency with payload capacity. For more on weight limits and planning, refer back to Section 1, or see The True Cost of Vanlife in the UK for budgeting realities.
Insulating around windows is tricky. Glass will always be the weakest thermal point. Options include thermal blinds, insulated curtains, or Reflectix cutouts. Skylights and vents should be sealed tightly to prevent draughts. See Campervan Ventilation Fans & Skylights for guidance on keeping airflow without compromising insulation.
Some vanlifers add underfloor heating or thermal mats, but this is more of a luxury than a necessity. A good diesel heater combined with proper insulation is usually enough for year-round comfort in the UK. See Best Diesel Heaters for Campervans (UK Reviews) if you’re weighing up heating options alongside insulation.
Fire safety is a final concern. Some insulation materials are more flammable than others. PIR boards and treated wool are generally fire-resistant, while some foams are not. Always check ratings and never place insulation directly against hot exhausts, heaters, or gas appliances. Safety first - comfort means nothing if your build isn’t fire safe.
Take your time on insulation. Rushing this stage or cutting corners leads to long-term problems you can’t easily fix. Once panelling and furniture are installed, revisiting insulation is a nightmare. Do it right the first time, and you’ll thank yourself every cold winter morning or humid summer night on the road.
Campervan Flooring & Walls
Flooring and walls form the foundation of your van’s interior. Get them right, and you’ll have a durable, quiet, and comfortable living space. Get them wrong, and you’ll battle squeaks, drafts, and a floor that feels like a trampoline. This stage isn’t glamorous, but it’s crucial.
https://theferalway.com/complete-campervan-conversion-guide-uk/


Comments
Post a Comment